Integrations
The Integrations module serves as a central hub within the platform, enabling users to connect the application seamlessly to a wide range of storage and database providers. These integrations facilitate secure, high-performance data access, allowing users to centralize their workflows and run queries directly within the platform.
This documentation provides a comprehensive overview of available integrations, setup procedures, and key features of each provider, along with troubleshooting guidelines to ensure smooth connectivity and minimal downtime.
Storage Provider Page
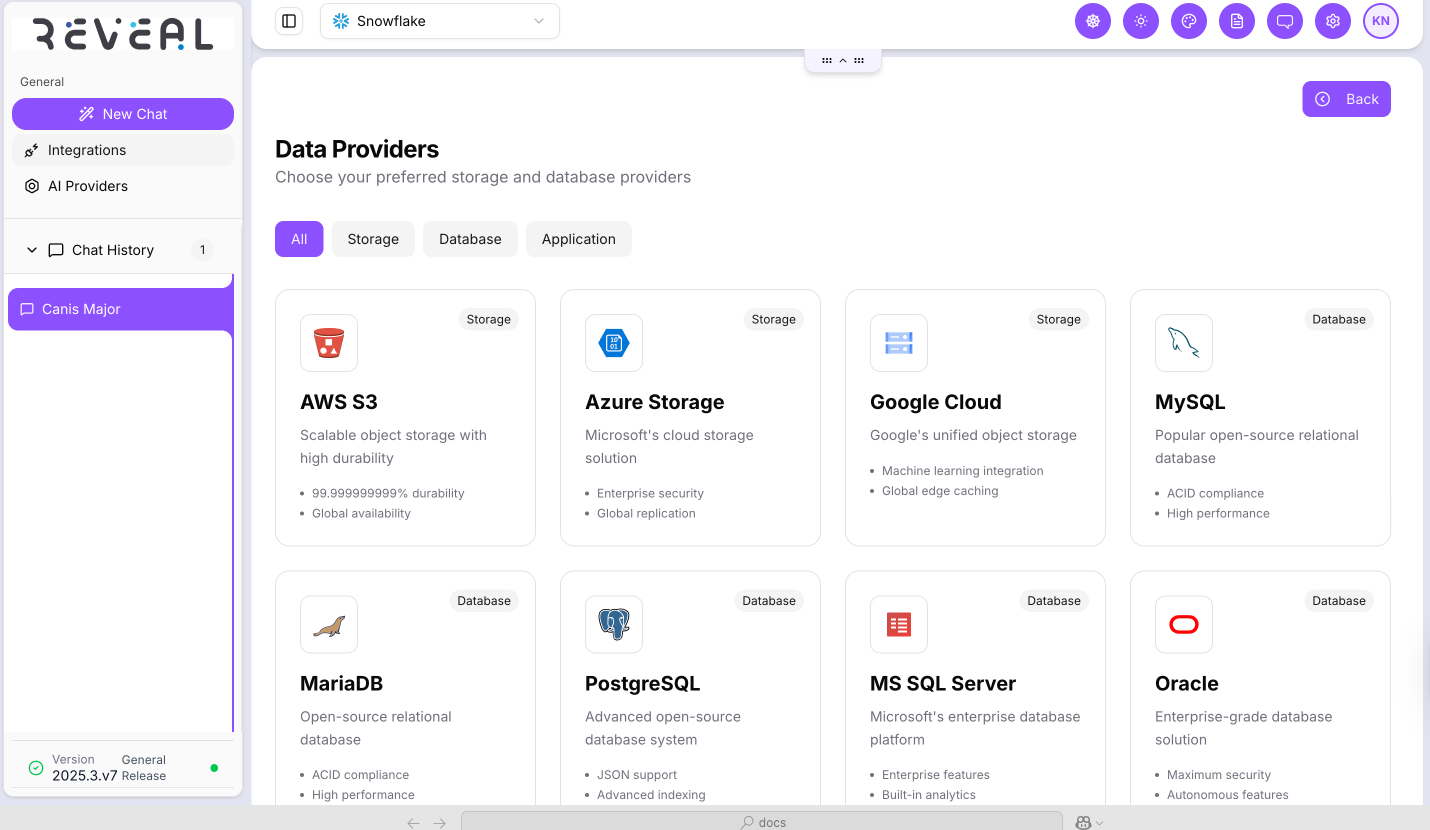
The Storage Provider Page serves as the homepage for the Integrations component in Reveal, displaying all available integrations that users can select based on their data source or query requirements.
- Access the Integrations page from the left-hand navigation panel beneath the New Chat option.
The default view on this page displays all supported integration providers categorized under:
- All – Displays all available providers.
- Storage – Displays only storage providers.
- Database – Displays only database providers.
- Application – Displays only application providers.
- Users can select any provider from this page to initiate the connection setup process.
- Each provider tile displays a short description of its capabilities (e.g., storage durability, security features, replication, etc.).
Creating a New Connection
- Click on a provider tile (Storage, Database, or Application) to open the configuration modal.
Fill in the required fields specific to the chosen provider. Typical fields may include:
- Connection Name – A unique name to identify the integration.
- Account or Host Details – For connecting to the provider’s service.
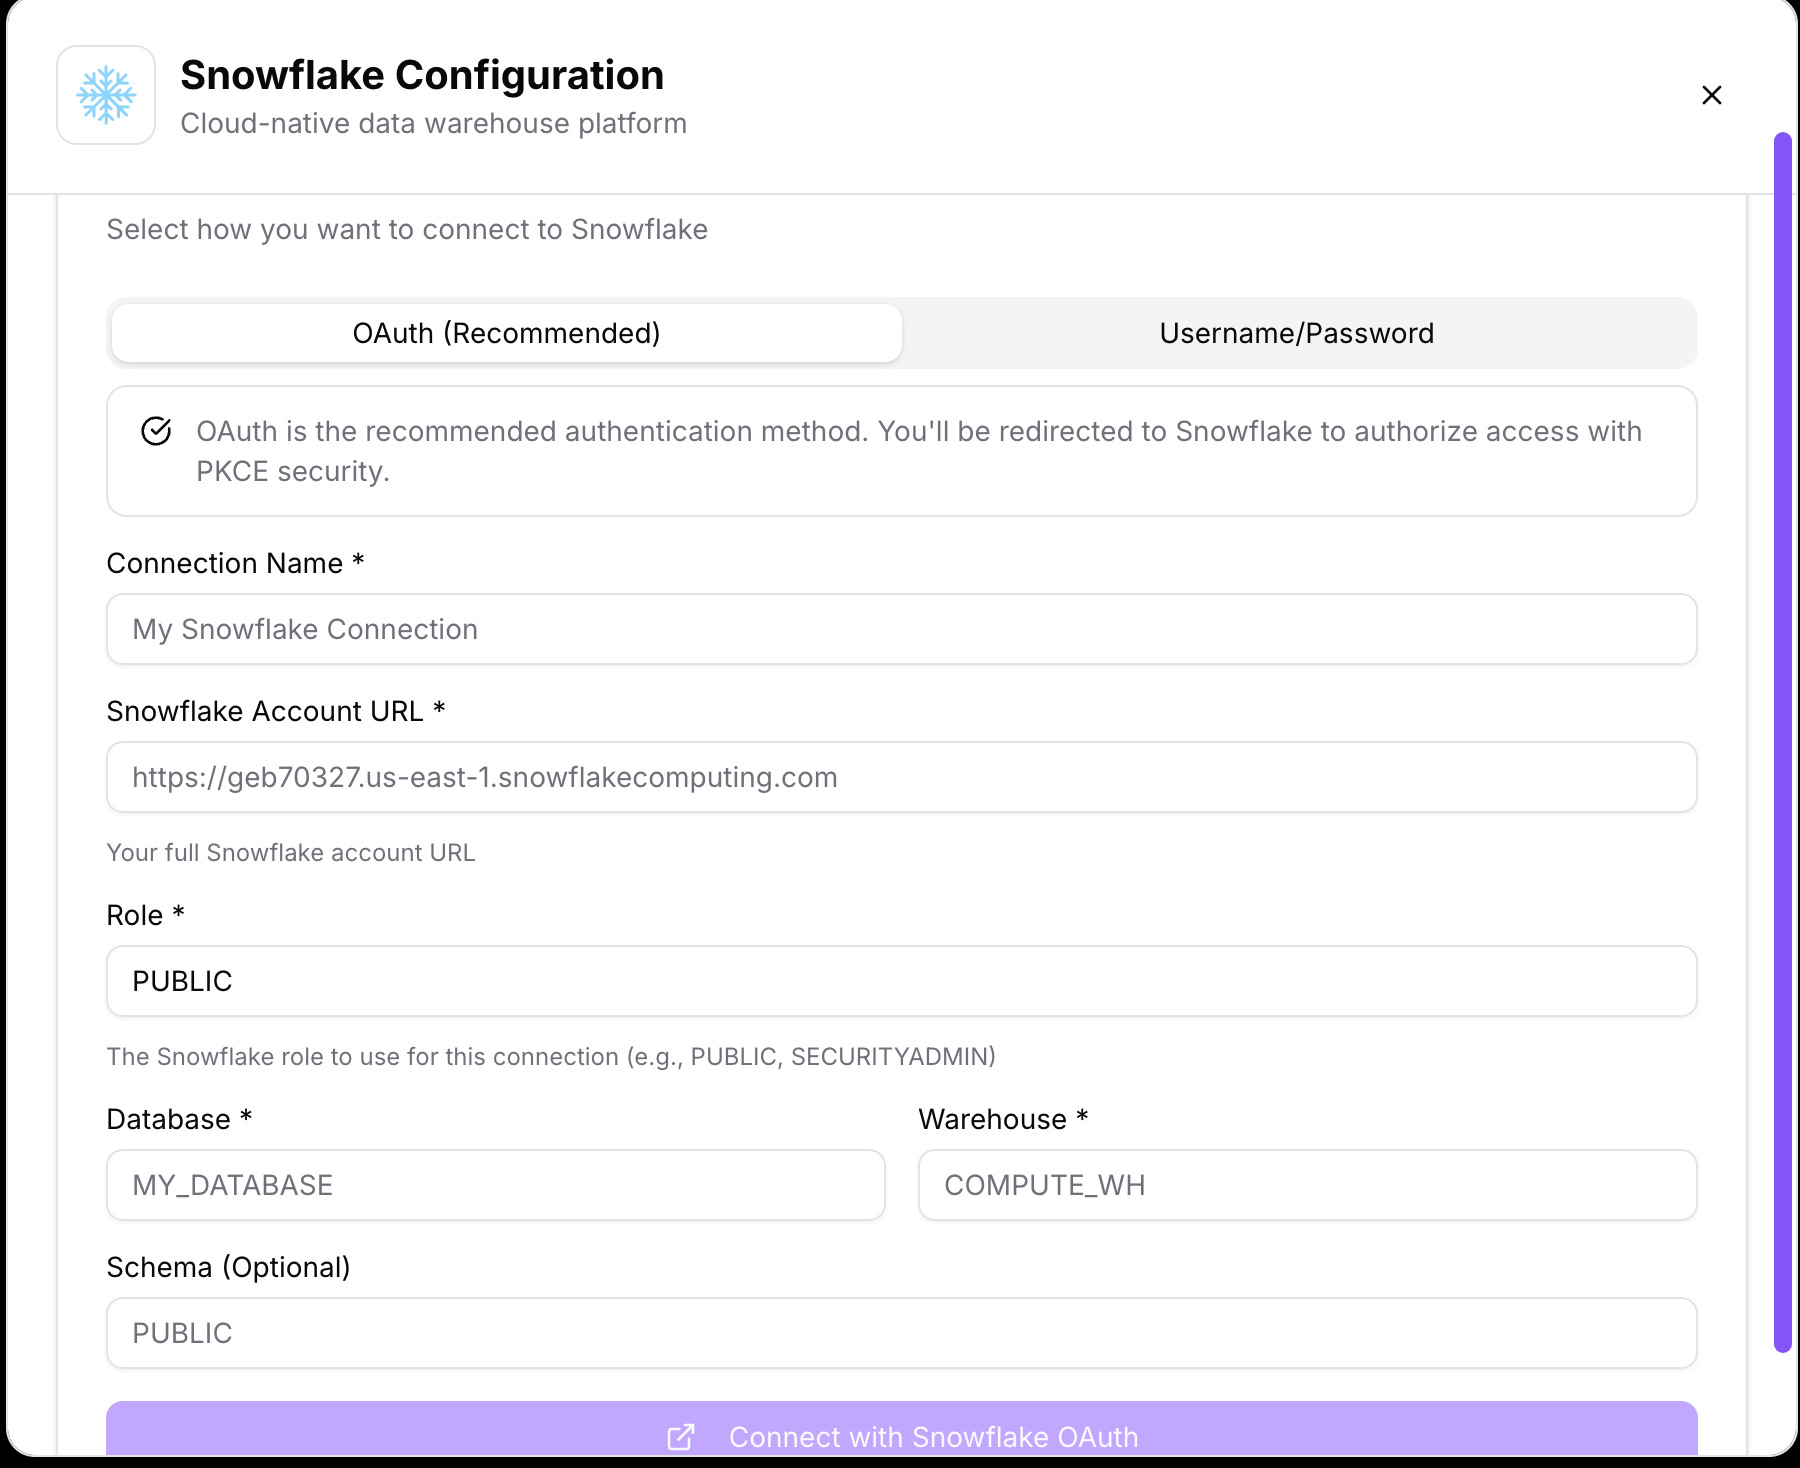
Authentication Details – Choose one of the following authentication methods:
- OAuth (Recommended) – Redirects you to the provider for secure authorization with PKCE support.
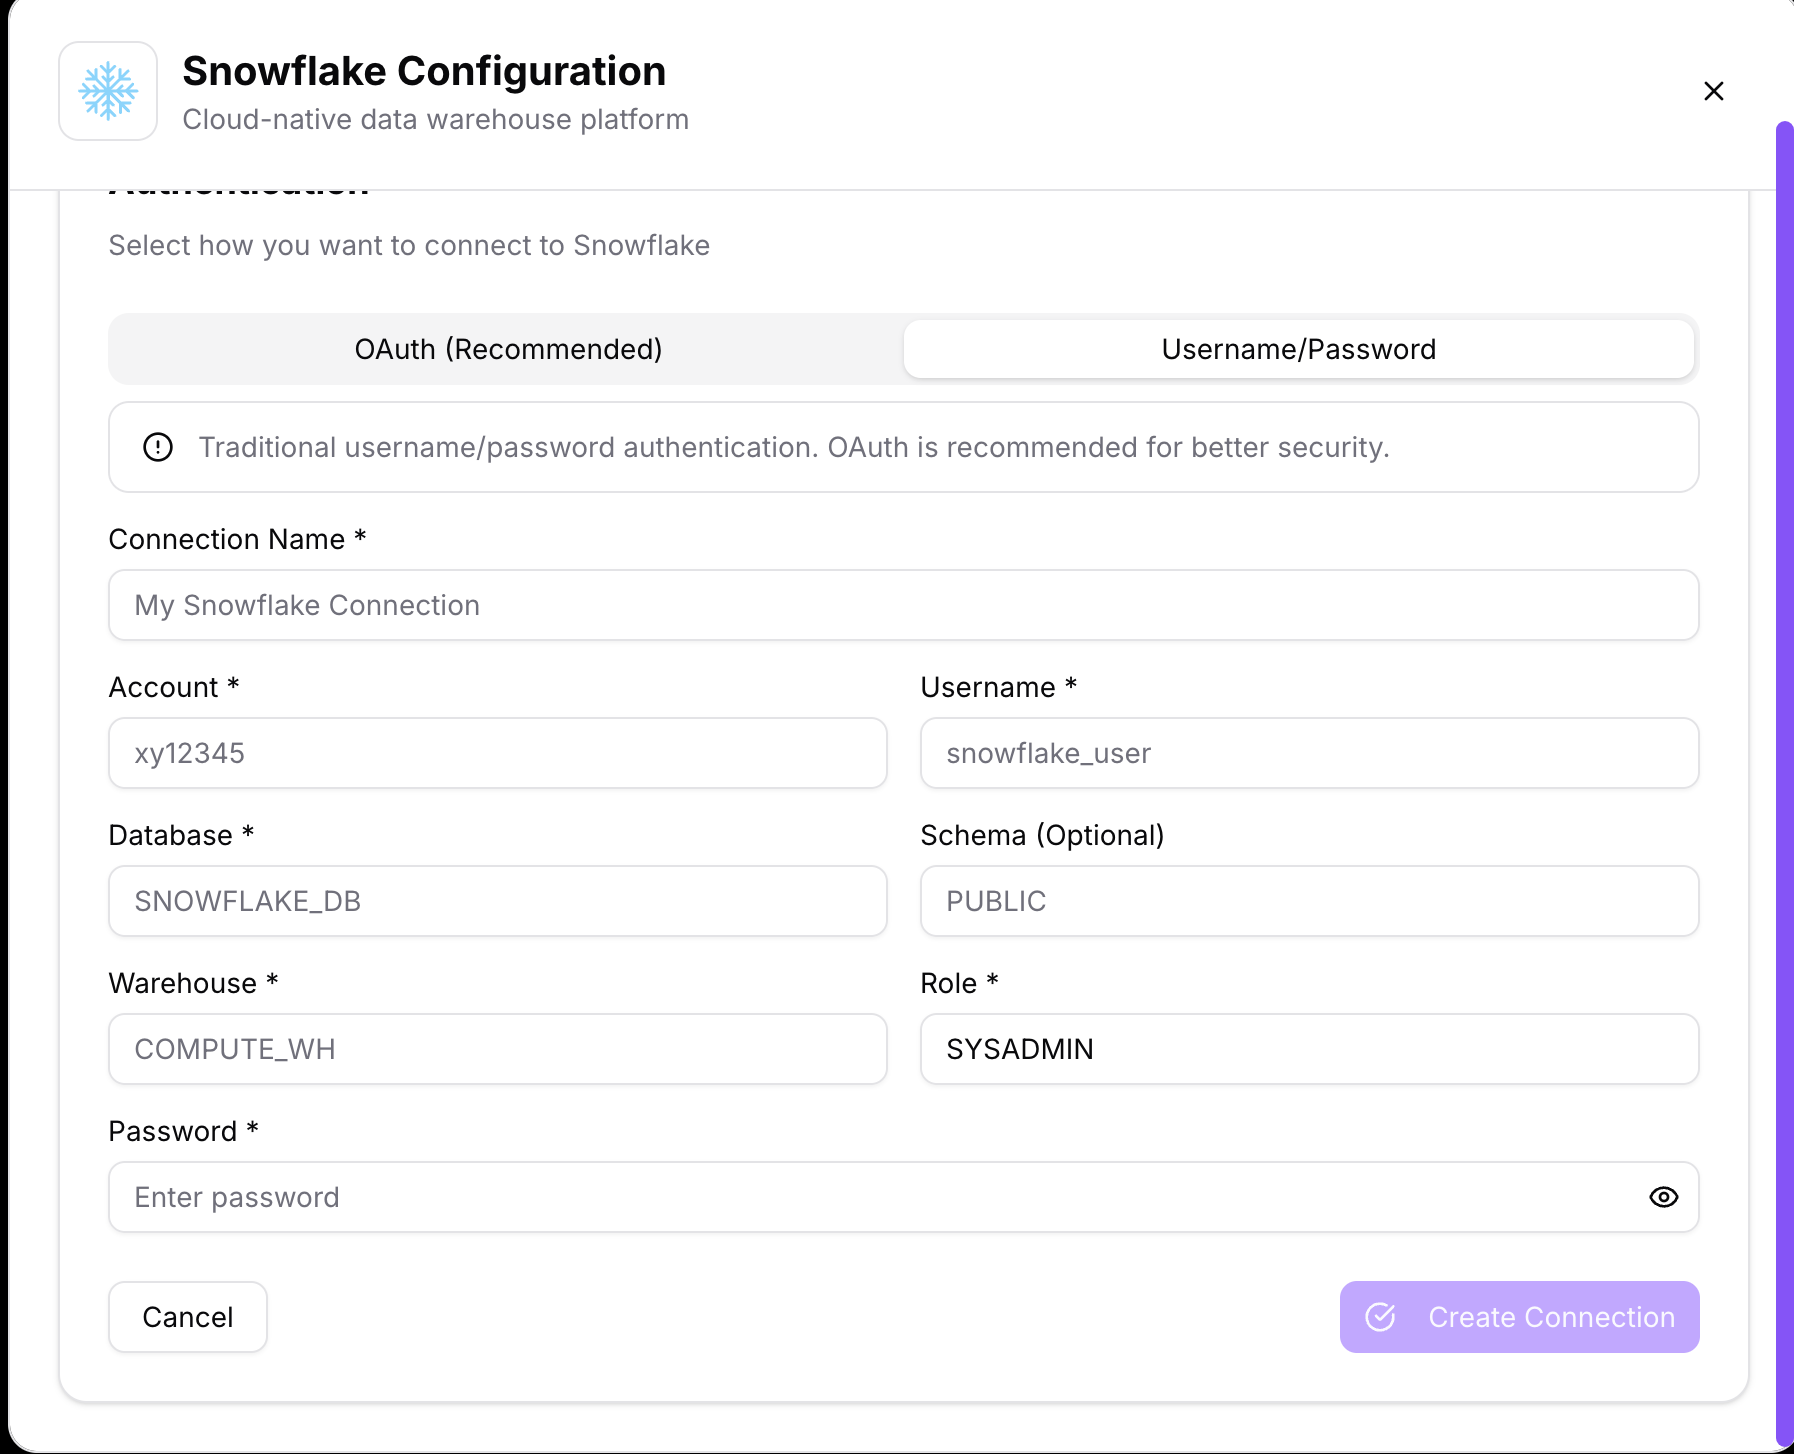
- Username/Password – Traditional login credentials used when OAuth is not configured.
- Database Configuration – Database name, schema, warehouse, or other required settings (for database integrations).
- Additional Parameters – Role, region, endpoint, or custom fields depending on the integration type.
- After entering the details, click on Create Connection to validate and save the integration.
- The platform will test the connection before saving. If successful, the integration will appear in the Connection Dropdown.
- One connection can be reused across multiple chats, enabling a consistent and efficient workflow.
OAuth (Recommended)
OAuth is a secure, token-based authentication method that eliminates the need to manually enter sensitive credentials. When selected, the platform redirects the user to the provider’s secure authorization page, where access is granted through PKCE (Proof Key for Code Exchange). Once authorized, the connection is automatically established, and tokens are managed securely. This method reduces credential exposure and simplifies ongoing access management.
Username/Password
This method requires users to manually input their account credentials, including username, password, database details, warehouse, schema, and role. It’s typically used when OAuth is not available or when service accounts are configured for direct access. While straightforward, it’s less secure than OAuth and requires users to manage and update credentials manually.
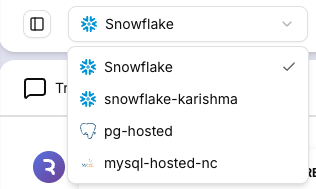
Connection Dropdown
- The Connection Dropdown is located at the top of the interface, just below the header.
- This dropdown lists all previously created and active connections, including Storage, Database, and Application types.
Users can:
- Select an existing connection to reuse it in a new or ongoing chat.
- Switch between multiple integrations without reconfiguring them.
- Quickly verify the connection name and type before running queries.
- This feature streamlines workflows, especially for teams who frequently work with multiple data sources.
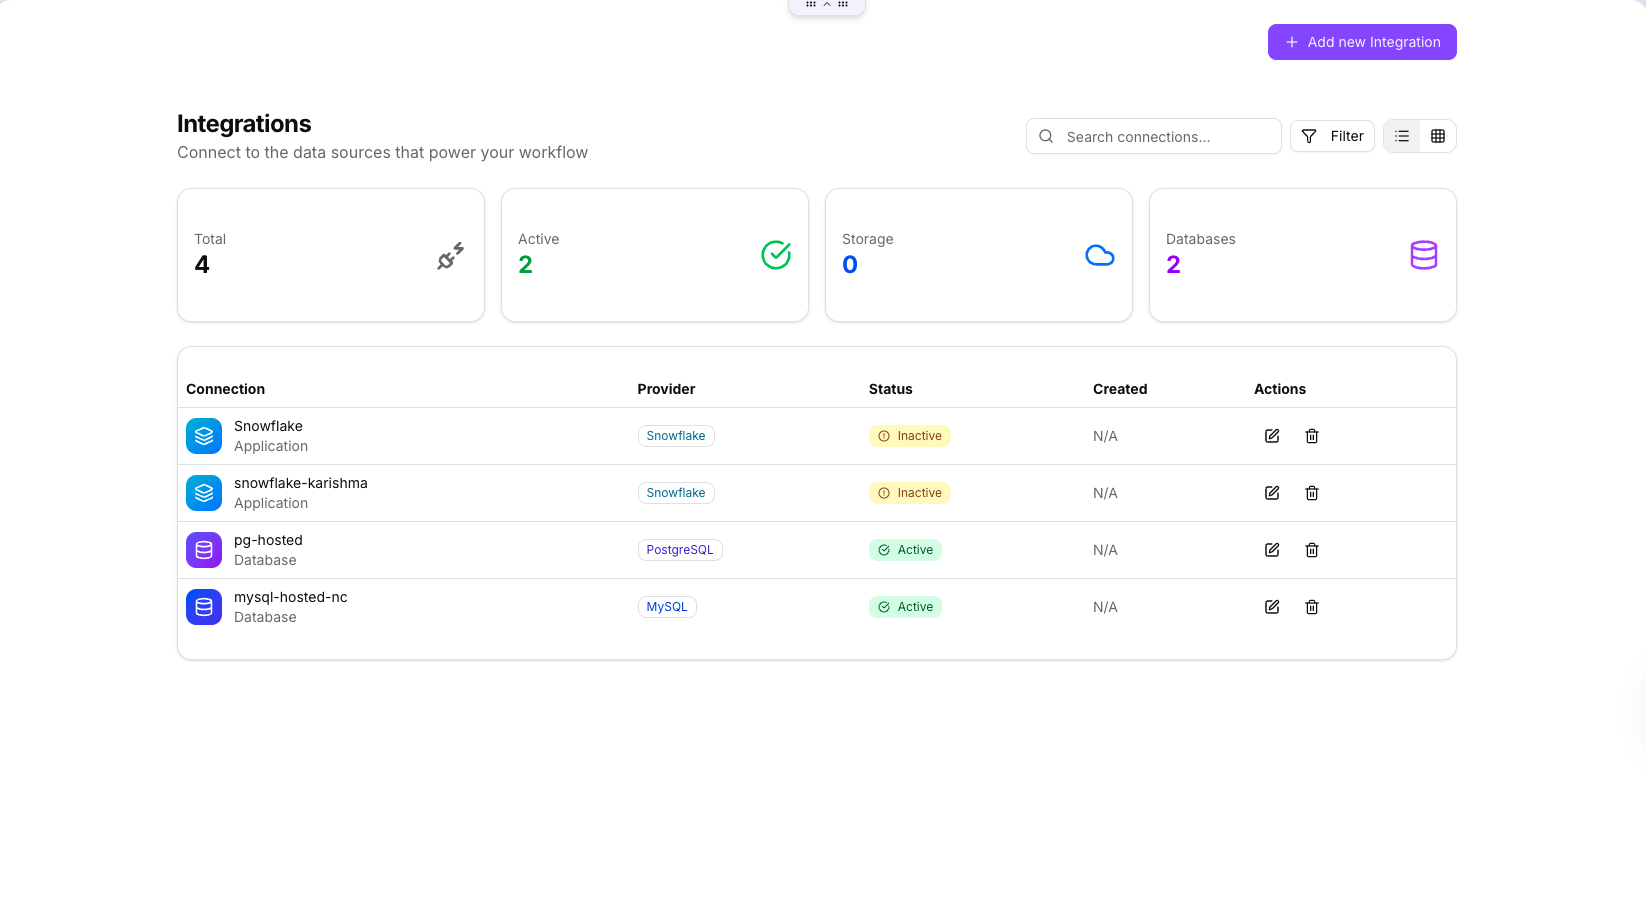
Storage Connections Page (Admin View)
- The Storage Connections page provides an administrative overview of all configured integrations. It displays:
- Total Connections – Count of all active and inactive integrations.
- Active Connections – Current live integrations available for use.
- Breakdown by Type – Number of Storage and Database connections.
- Admins can toggle between List View and Grid View for better visibility and management.
Below is an example of the List View layout for integrations.
Below is an example of the Grid View layout for integrations.

Each card or row displays:
- Connection name
- Provider type
- Status (Active / Inactive)
- Action buttons for editing or deleting the connection
- Only users with administrative access can modify or remove connections from this page.
- This centralized dashboard ensures governance and security of enterprise-wide integrations.
Troubleshooting
- Connection does not appear after creation
- Refresh the page and verify if the connection test was successful.
- Ensure the integration was saved and has an active status.
- Connection setup failed
- Double-check the account details, credentials, and configuration parameters.
- Ensure your access permissions are correct.
- Inactive or broken connections
- Re-authenticate or update credentials.
- Test the connection again from the provider’s configuration panel.
- Provider not listed
- Check if the provider is supported in your plan.
- Contact your administrator to enable or whitelist the integration.
If problems persist, contact your platform administrator or support team with the error details and a screenshot for quick resolution.