User Management
User Management lets administrators add, edit, and remove team members, assign roles, and control what each user can access in Reveal.
Open it by clicking the settings icon in the top navigation bar, then selecting the Users tab in Account Settings.
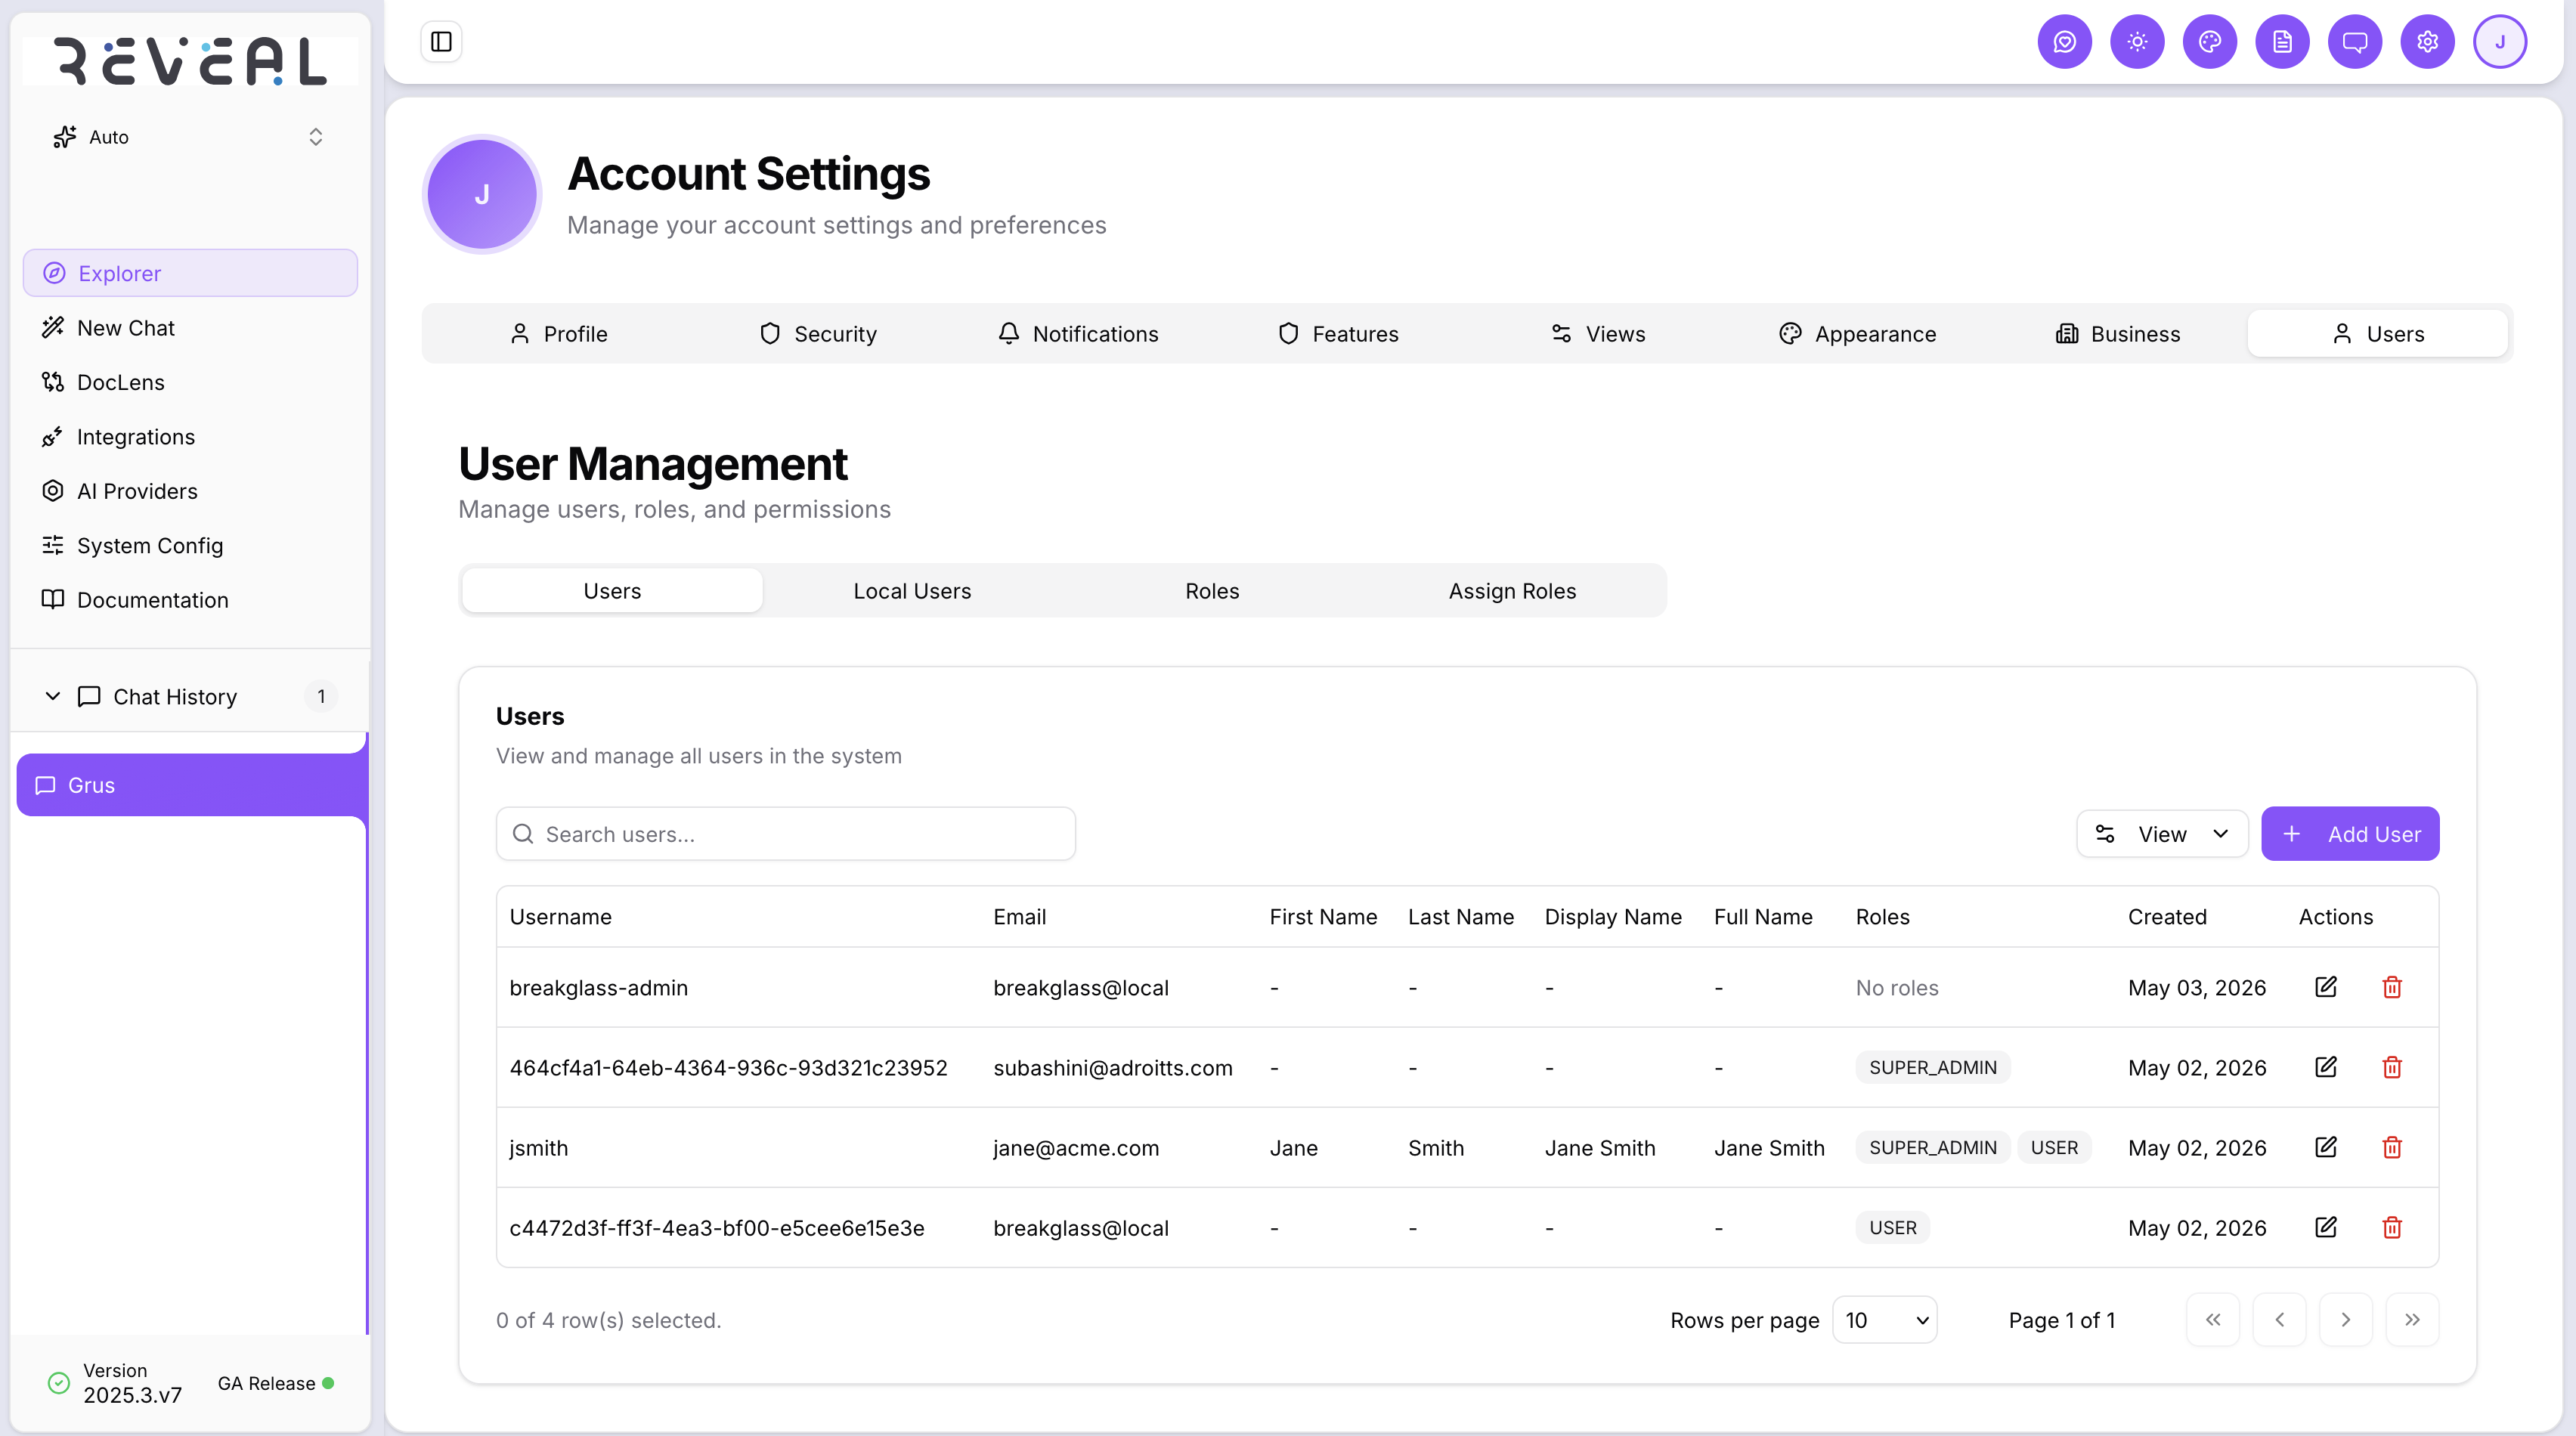
The page has four tabs: Users, Local Users, Roles, and Assign Roles.
Users tab
The Users tab lists all accounts in the system — both SSO-provisioned and local. Each row shows:
| Column | Description |
|---|---|
| Username | The account identifier |
| Email address | |
| First Name / Last Name | Display name fields |
| Display Name | Optional short display label |
| Full Name | Combined first and last name |
| Roles | Role badges assigned to this account |
| Created | Account creation date |
| Actions | Edit (pencil) and Delete (trash) icons |
Use the Search users bar to filter by name or email. Click Add User to create a new account.
Adding a user
Click Add User, fill in the user's details, assign a role, and click Save. The user can log in immediately.
Editing a user
Click the edit icon on any row to update the user's name, email, or role.
Removing a user
Click the delete icon and confirm. This revokes access immediately.
Local Users tab
The Local Users tab manages accounts that authenticate with a username and password — as opposed to SSO-provisioned accounts.
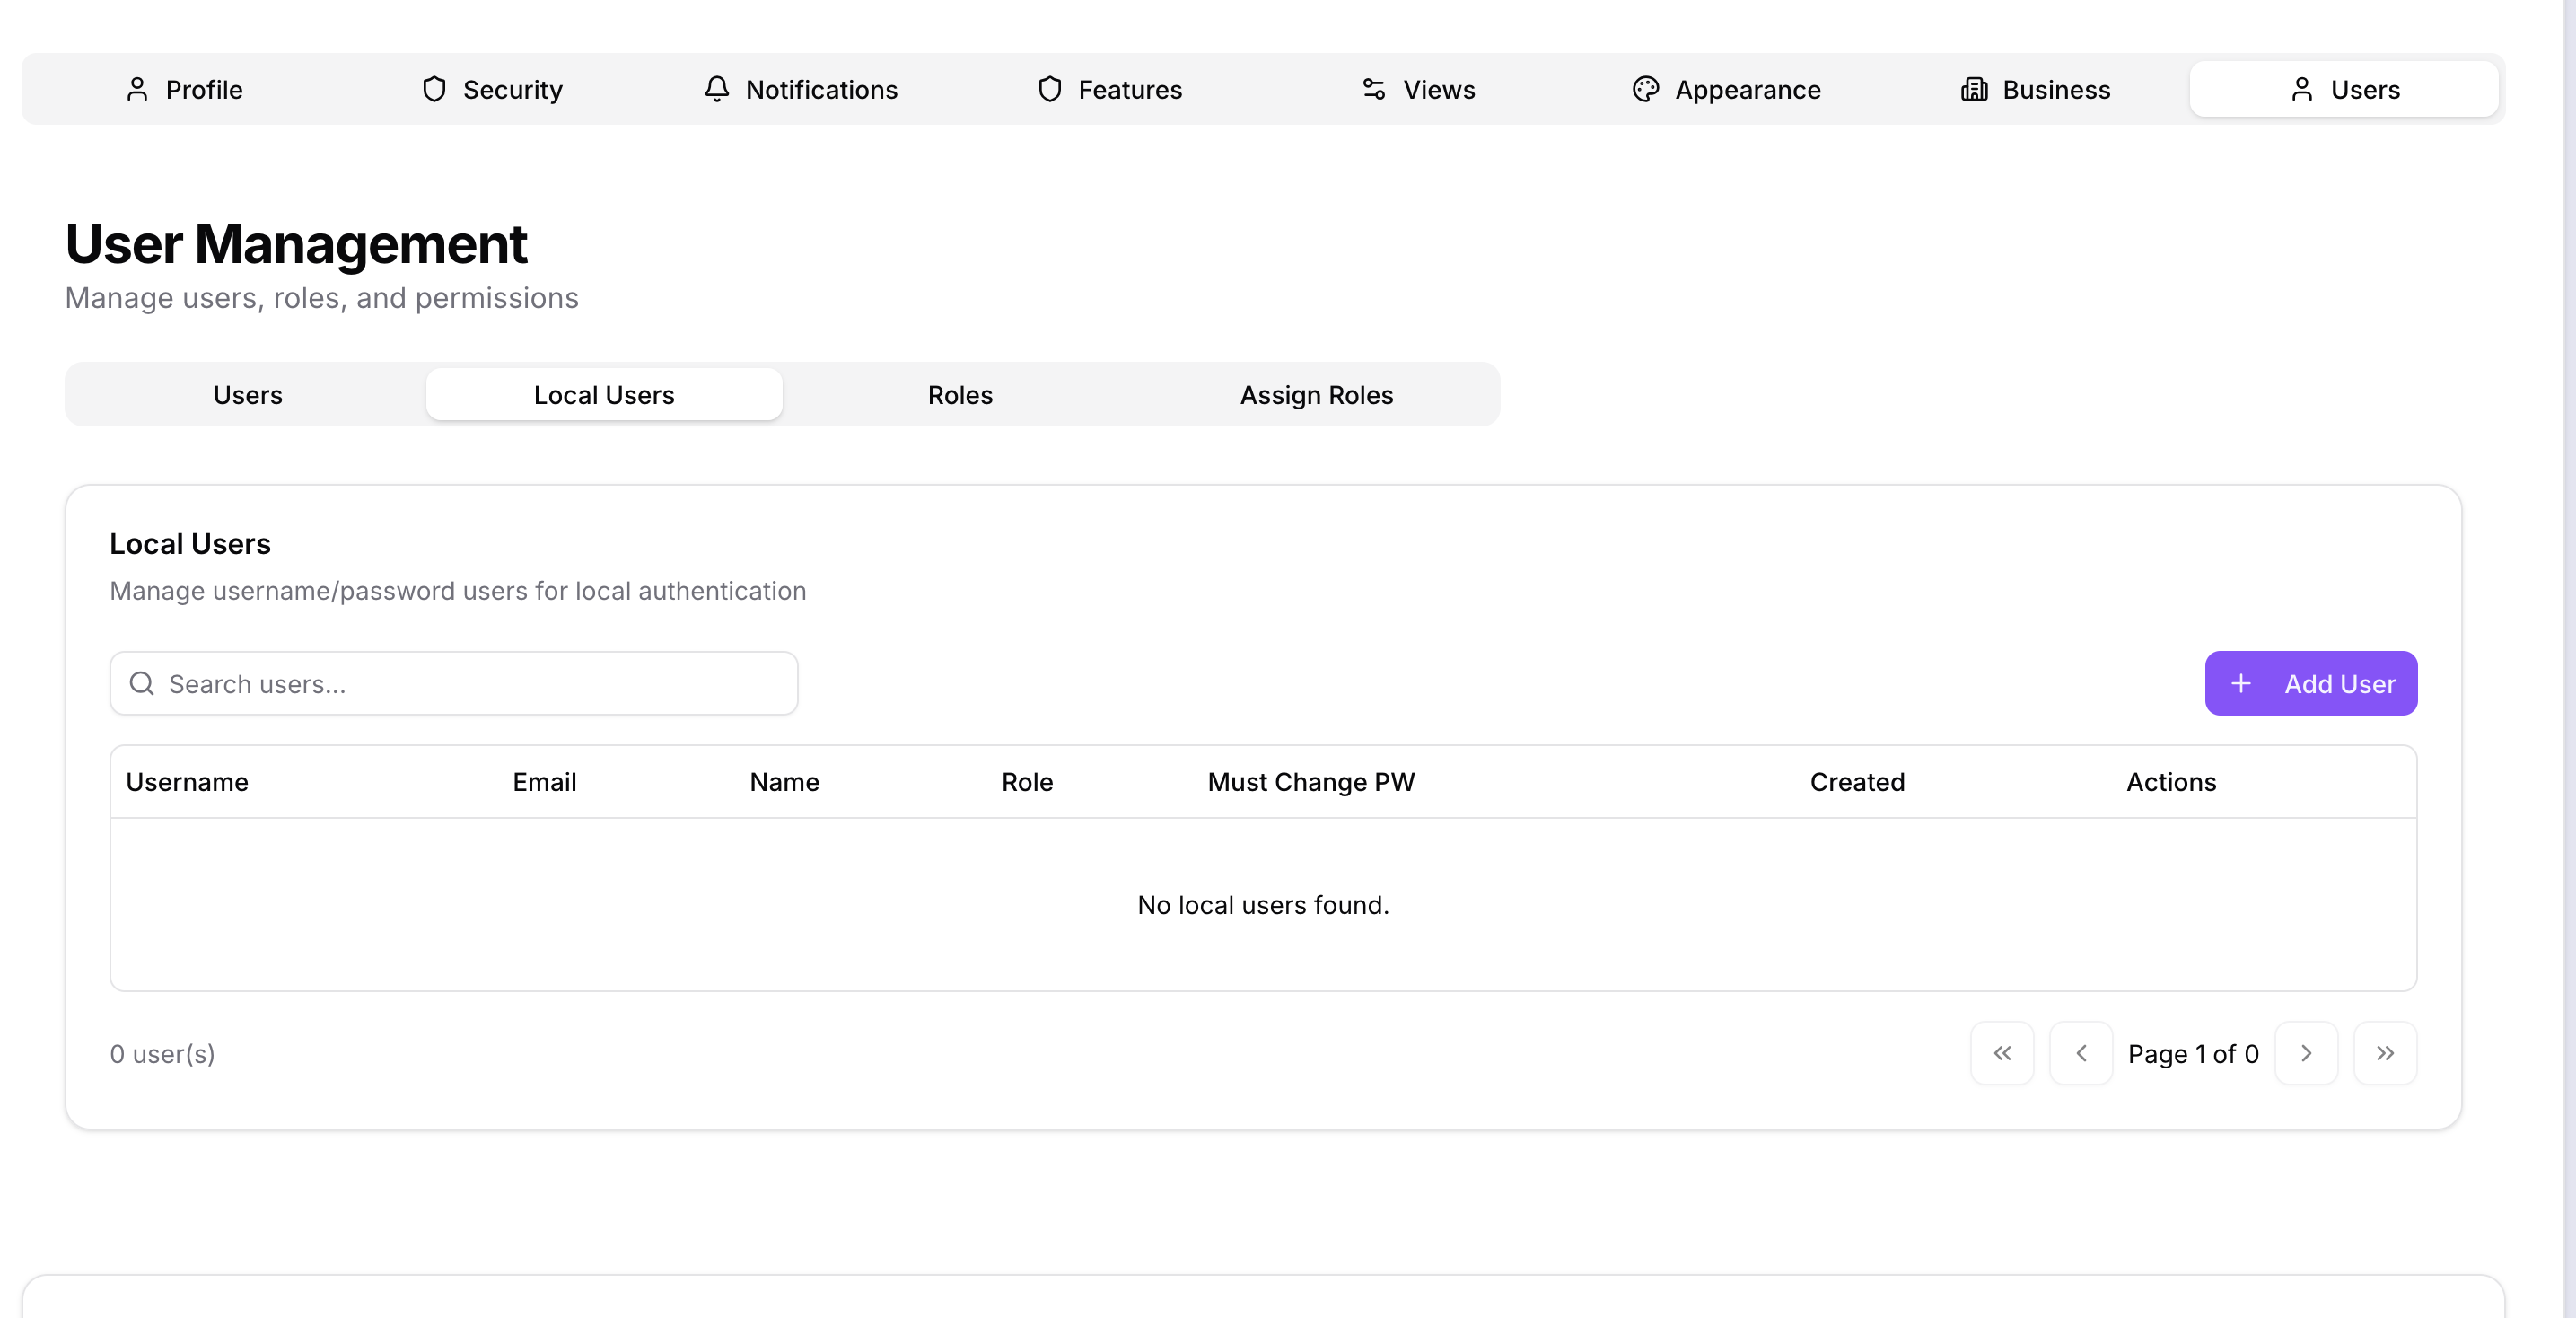
The table shows Username, Email, Name, Role, Must Change PW (whether the user is required to change their password on next login), and Created date.
Creating a local user
Click Add User to open the Create Local User form.
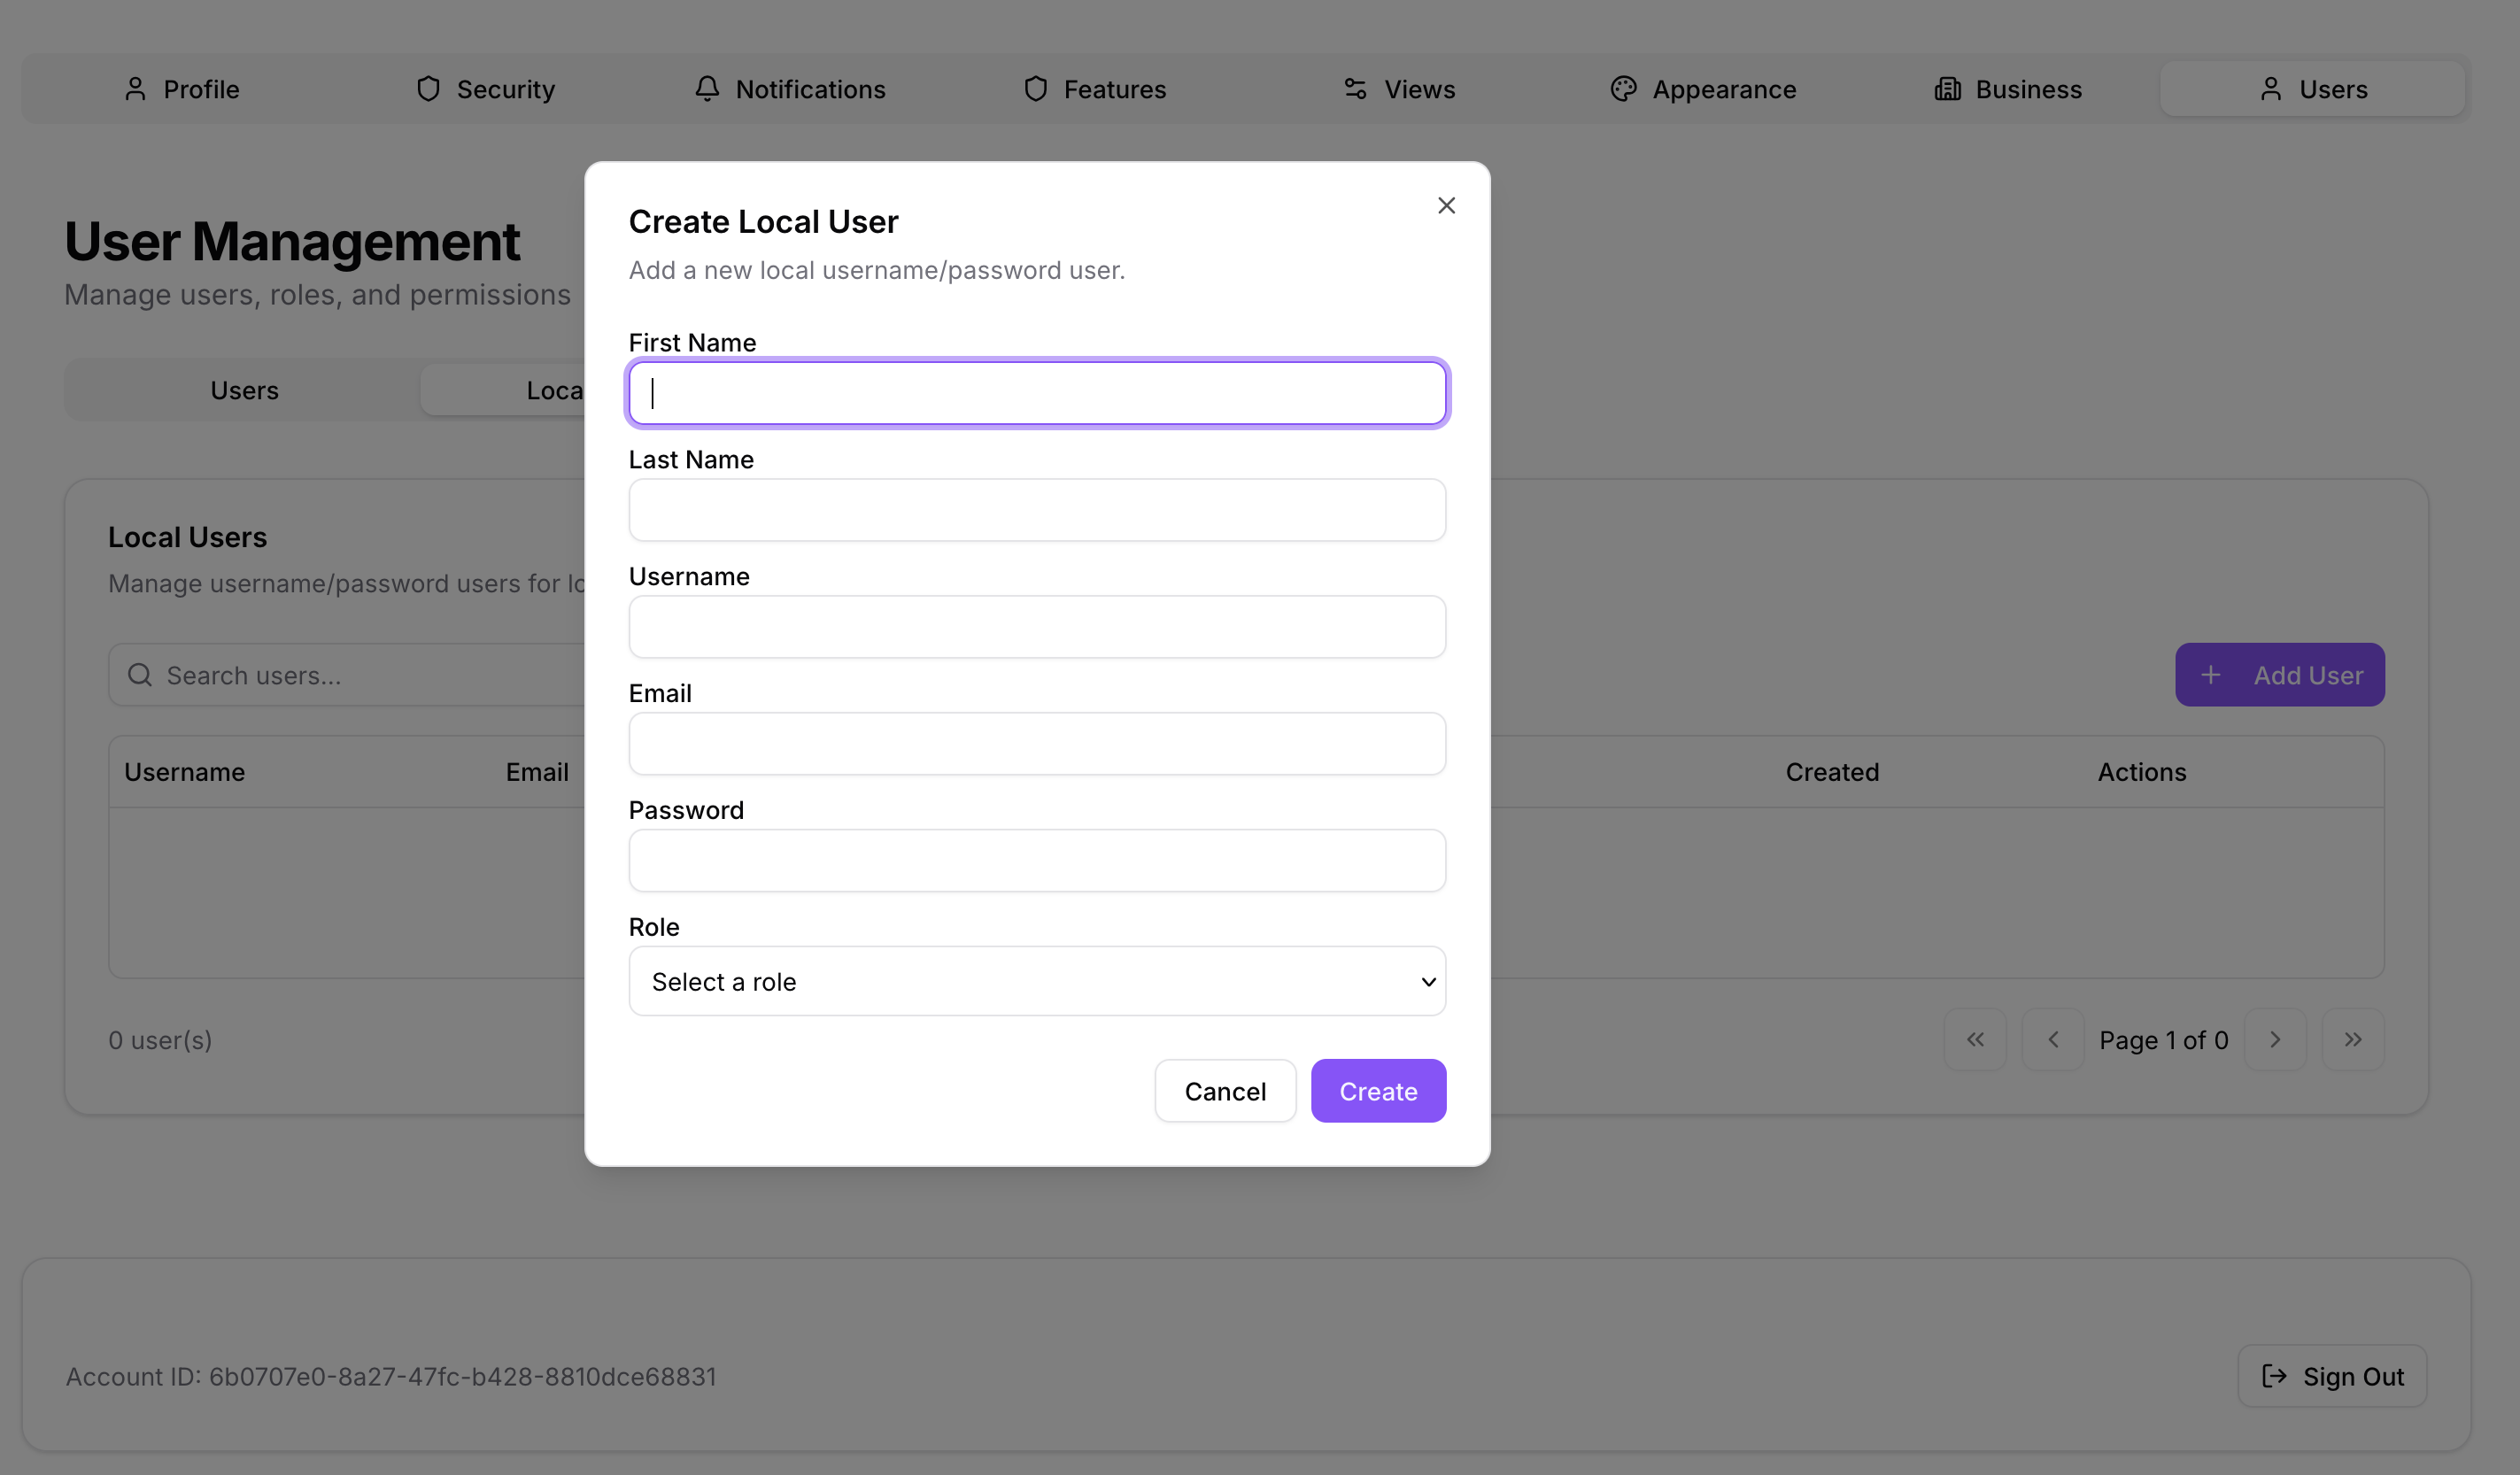
Fill in:
- First Name and Last Name
- Username — used to log in
- Password — set an initial password
- Role — select a role from the dropdown
Click Create. The user logs in at /auth/local using their username and password.
Password management
- Administrators can reset any local user's password from the edit panel
- If Must Change PW is enabled, the user is prompted to set a new password on their next login
Roles tab
The Roles tab lists all roles in the system — both default system roles and any custom roles you have created.
Each role has a name and description. Default roles are marked and cannot be deleted. Custom roles can be created to define additional access levels.
Creating a custom role
- Go to the Roles tab
- Click New Role
- Enter a role name and optional description
- Click Save
Once created, the role is available to assign to users from the Assign Roles tab.
Assign Roles tab
The Assign Roles tab lets you add or remove roles for any user.
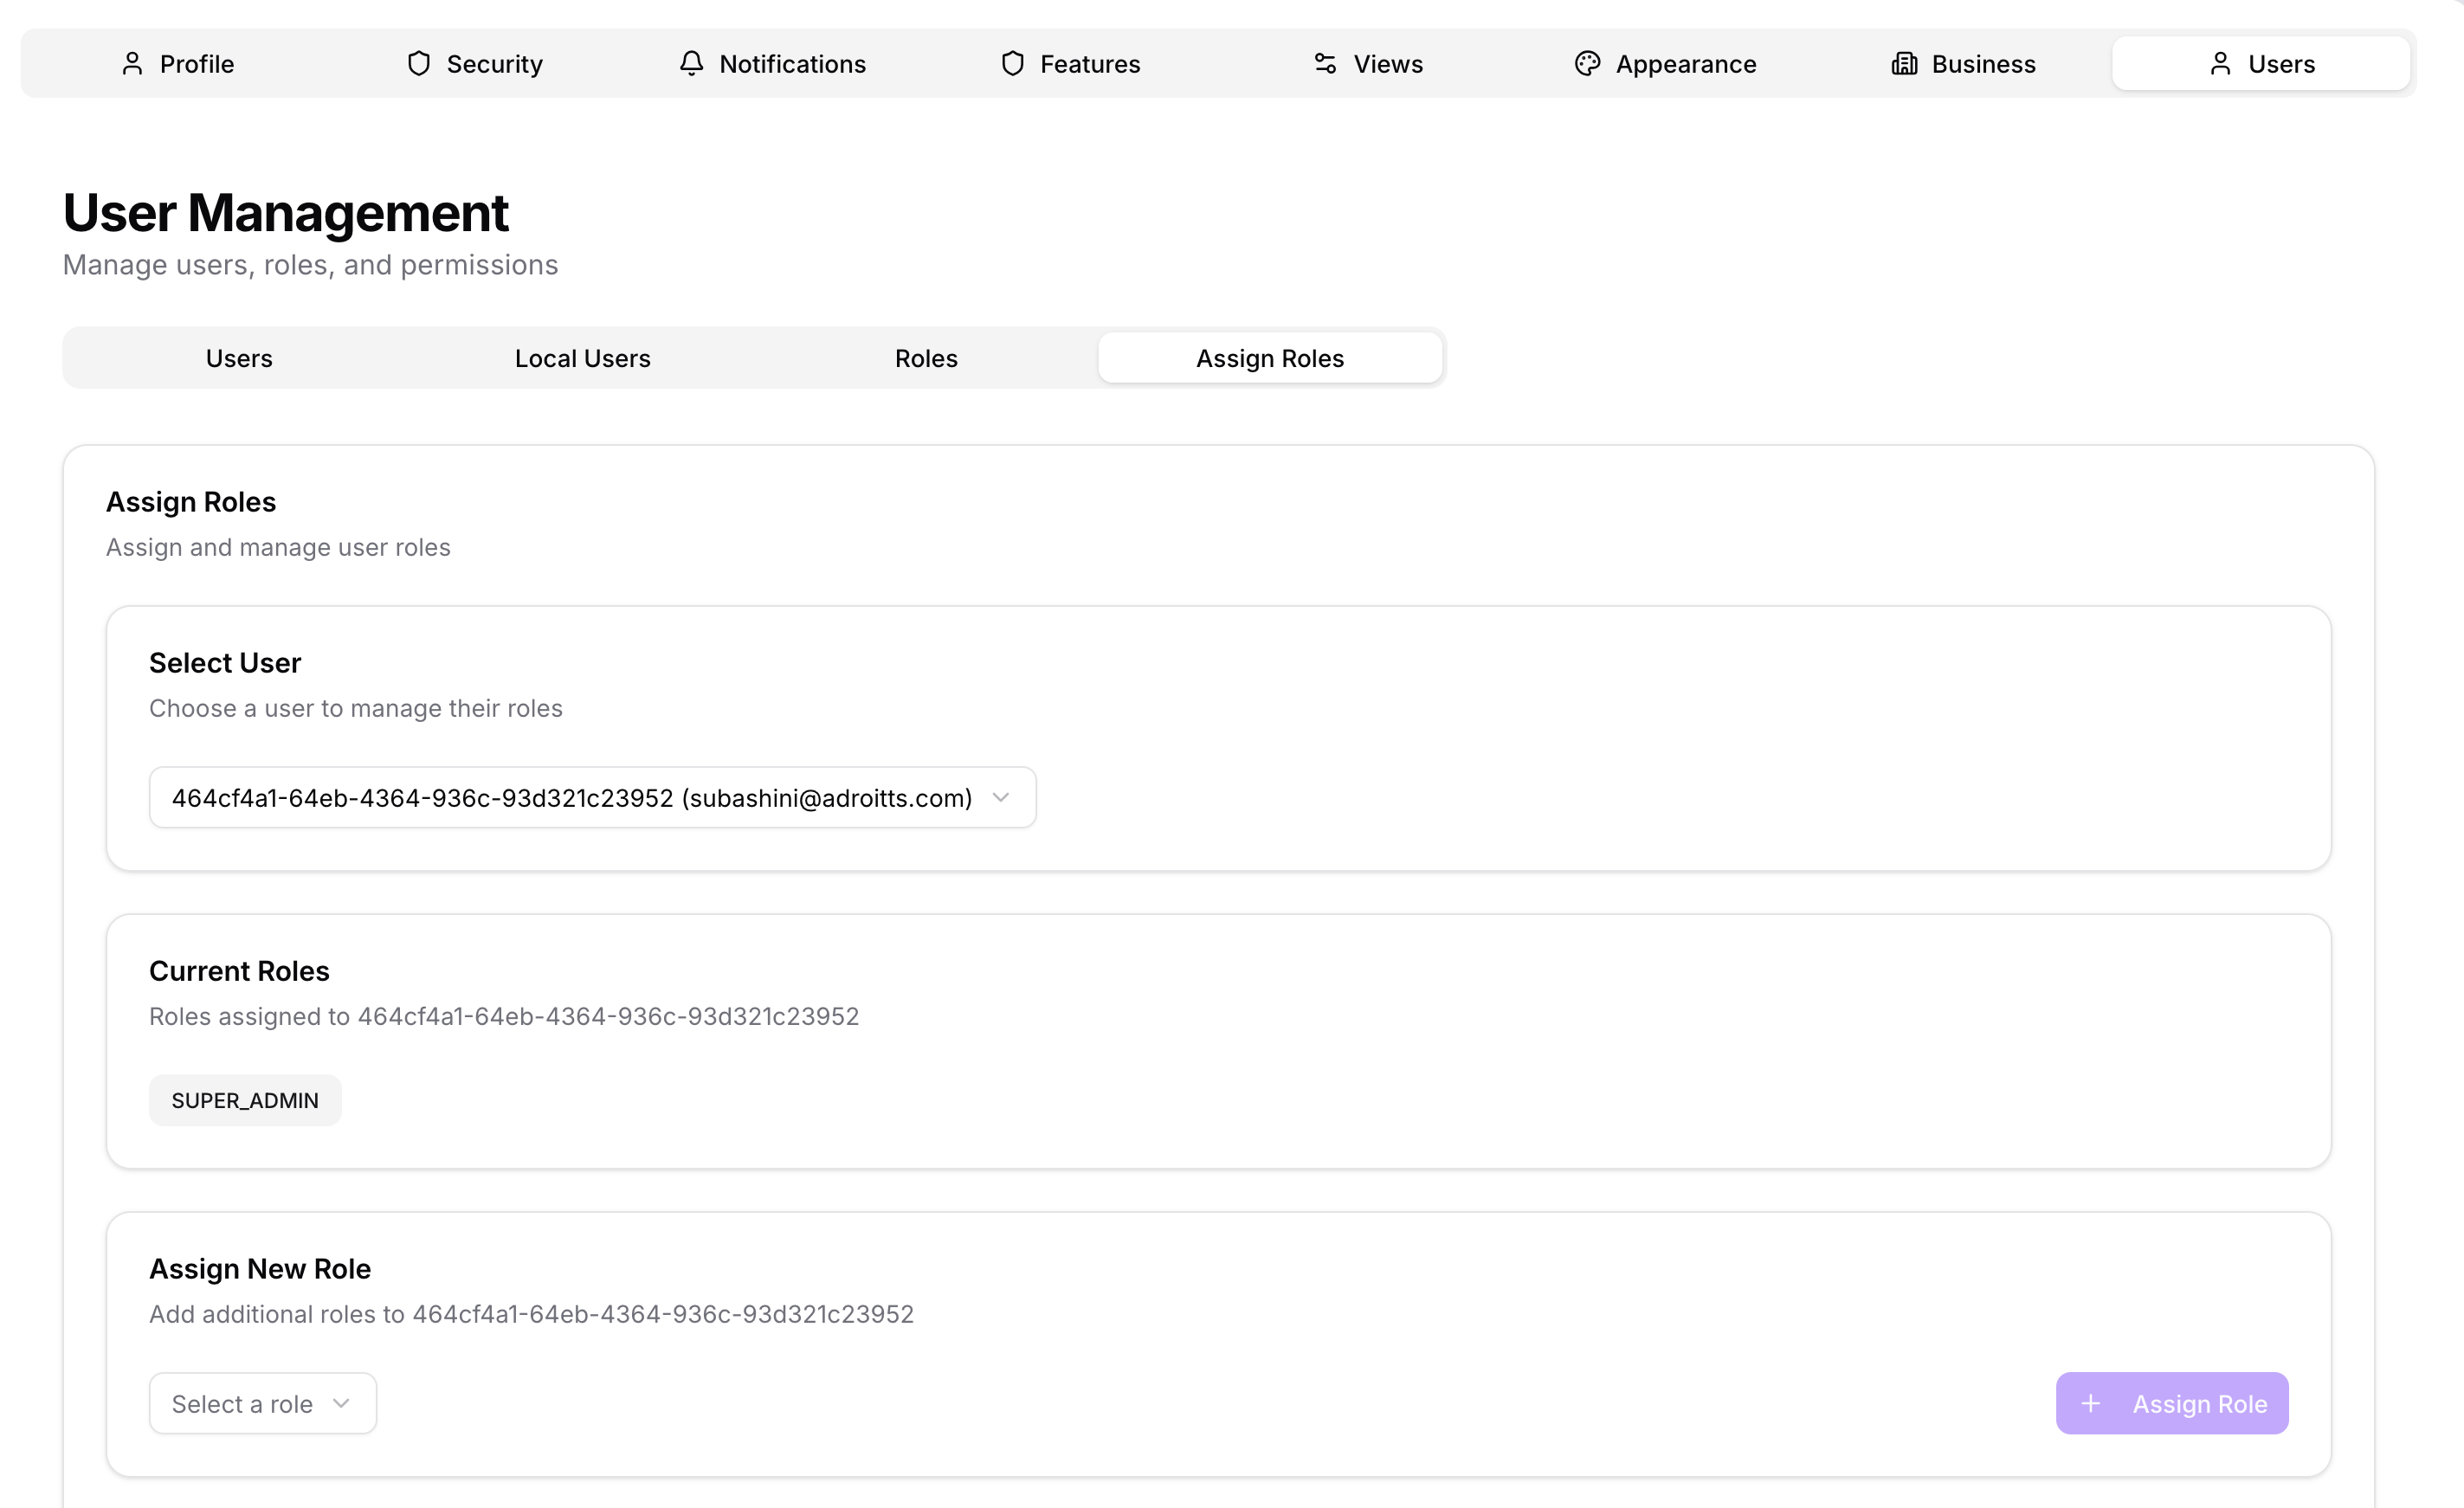
- Select User — choose a user from the dropdown (shown as username + email)
- Current Roles — shows all roles currently assigned to that user
- Assign New Role — select a role from the dropdown and click Assign Role to add it
Users can hold multiple roles simultaneously. To remove a role, use the role badge's remove control in the Current Roles section.
SSO users
If your organisation uses SSO (Azure AD, Okta, Google, or another OIDC provider), users are provisioned automatically on first login. Their initial role is set by the default role configured in System Config.
Assign admin-level roles sparingly — only to users who need to manage system configuration and other accounts.